Connect your first device
Who this is for — you have a MikroTik router (RouterOS 6 or 7) and want AccessCore deciding who gets online through it.
Connecting a router is a one-time job: you paste one script into the router's terminal, and from that moment AccessCore configures everything else for you — you never paste again. The whole thing takes about three minutes, and it's designed to be safe: it adds to your router's setup, it doesn't rebuild it.
Before you start
The setup page repeats these, but they're the three things that trip people up — check them on the router first:
- The router has working internet
It needs to reach AccessCore to report in.
- Its address lookup (DNS) works
If the router can't resolve names, the script can't call home.
- The clock is correct
A wrong date breaks the secure connection — this is the sneaky one.
- Running several hotspot routers? Use ONE WiFi name
Phones treat every WiFi name (SSID) as a different network and change their address on each — that's the phone's privacy design, and no setting undoes it. Give all your routers the same SSID and customers roam between them with their remaining time; name them Venue-1, Venue-2 and every router asks them to sign in again.
Step 1 — Tell AccessCore about the device
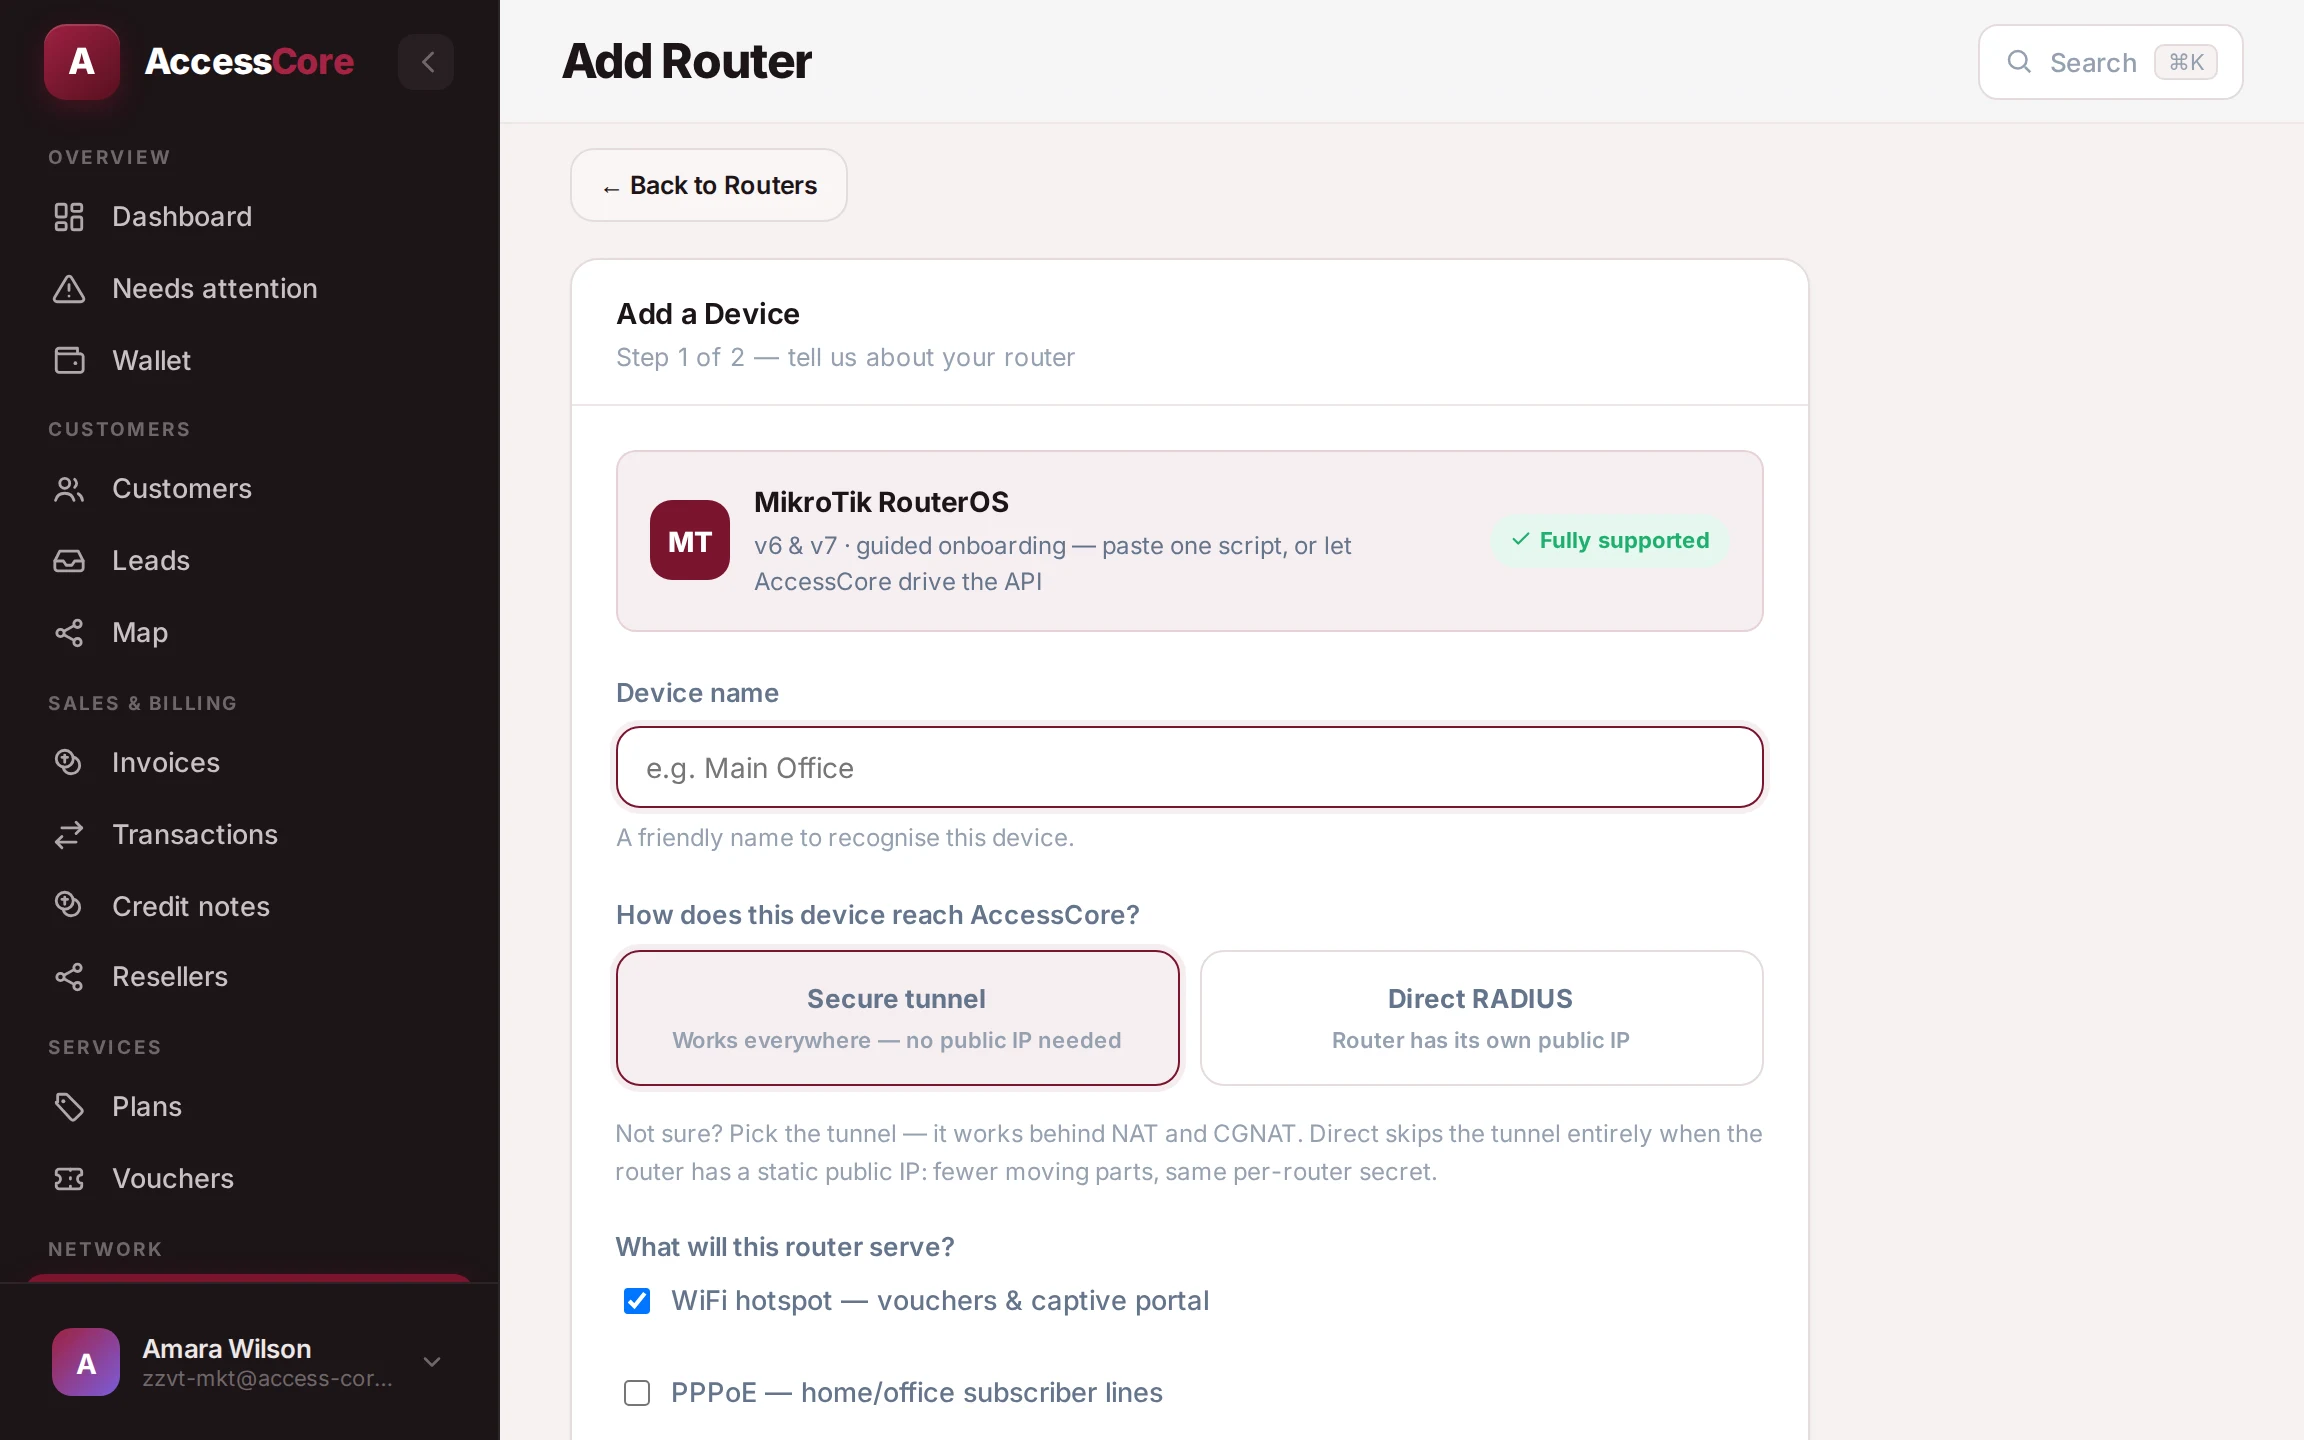
- Open Devices and click + Add Device
You'll land on Add a Device — "Step 1 of 2 — tell us about your router." AccessCore is built for MikroTik RouterOS (v6 and v7), and the page confirms it up top. Running different hardware? Use Request support at the bottom of the page to tell us what you use — requests go straight to the roadmap.
- Name it, and choose how it reaches AccessCore
Give it a friendly Device name like "Main Office". For How does this device reach AccessCore?, pick Secure tunnel unless the router has its own public IP address — the tunnel works everywhere, including behind mobile or shared connections.
- Tick what it will serve
WiFi hotspot — vouchers & captive portal, PPPoE — home/office subscriber lines, or both. Not final — you can add or remove services any time.
- Click Continue → Generate setup
Step 2 — The one-time paste
- Open your router's terminal
In Winbox: New Terminal. In the browser (WebFig): Terminal. On a phone, scan the QR code on the setup page to open it there.
- Copy the whole script and paste it in
Use Copy script (or Download .rsc if you prefer a file), paste into the terminal, press Enter. Paste the entire block — it's built to be re-pasted safely, nothing duplicates.
- Watch the page turn green
You don't copy anything back. The router reports in by itself and the setup page flips to Connected! — usually within a minute. Then click Continue — set up the network →.
 Copy script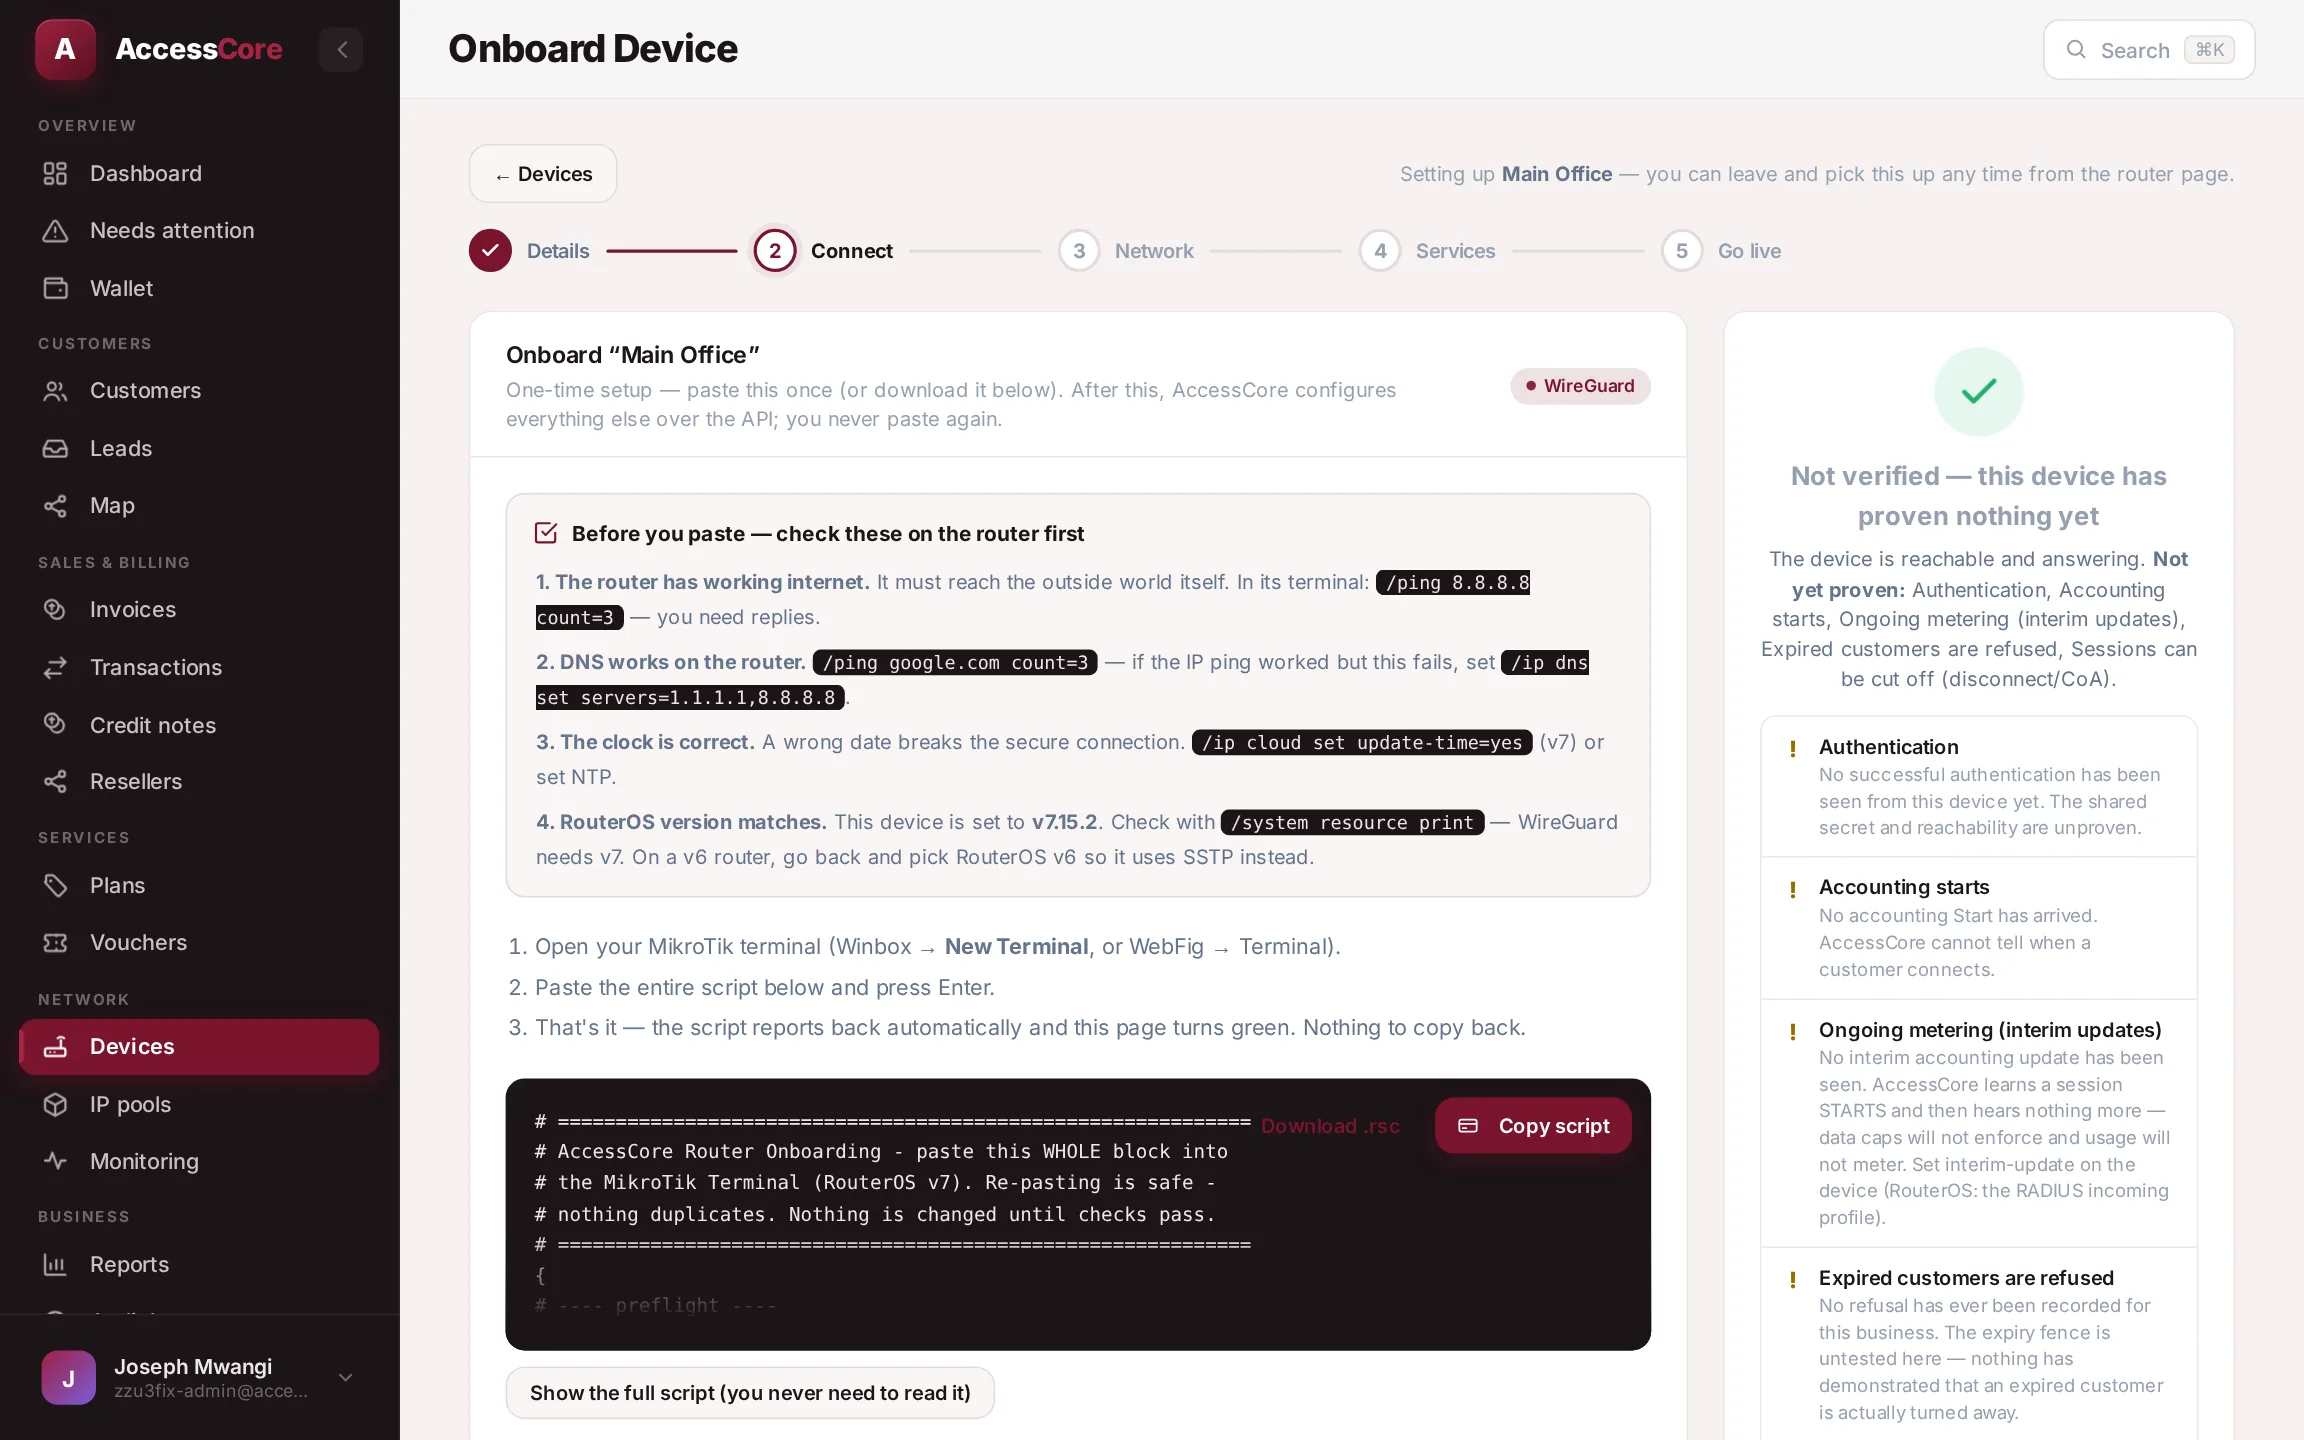
Safe & reversible — the script only adds a secure connection back to AccessCore and points sign-ins at it. It won't disconnect your existing setup, and a config backup is taken before anything else is ever written.
Step 3 — Let the wizard set up your services
From here it's all point-and-click in AccessCore — the wizard walks Details · Connect · Network · Services · Go live across the top:
- Describe your wiring
How is your network wired? — most operators pick Separate ports (hotspot and home lines on their own ports). Single LAN and VLANs on a trunk are there if that's your setup. Click Save & continue.
- Point each service at a port
For the hotspot, choose the Hotspot interface (the Detect button finds likely candidates). For subscriber lines, the Subscriber interface and an address pool. Click Save & review.
- Review, then Apply to router
The Go live screen lists exactly what will be created — gateway address, your branded sign-in page, and so on — before touching anything. Apply, watch each step confirm, and finish on: "Done — the router confirmed every step. This service is live and waiting for its first customer."
 Apply to router
If nothing turns green
The setup page has a Nothing happening after a minute? section with the usual causes — almost always one of the three pre-checks above. There's also a fallback: if the router couldn't reach the internet when the script ran, paste the router key the script printed into Fallback: paste router key and click Confirm connection. Re-running the paste is always safe.
Good to know — nothing in the wizard is one-shot. Every choice is editable later from the router's page, where you'll also find nightly Config backups, a read-only Security check, and a client-import tool if this router already has customers on it.
What success looks like
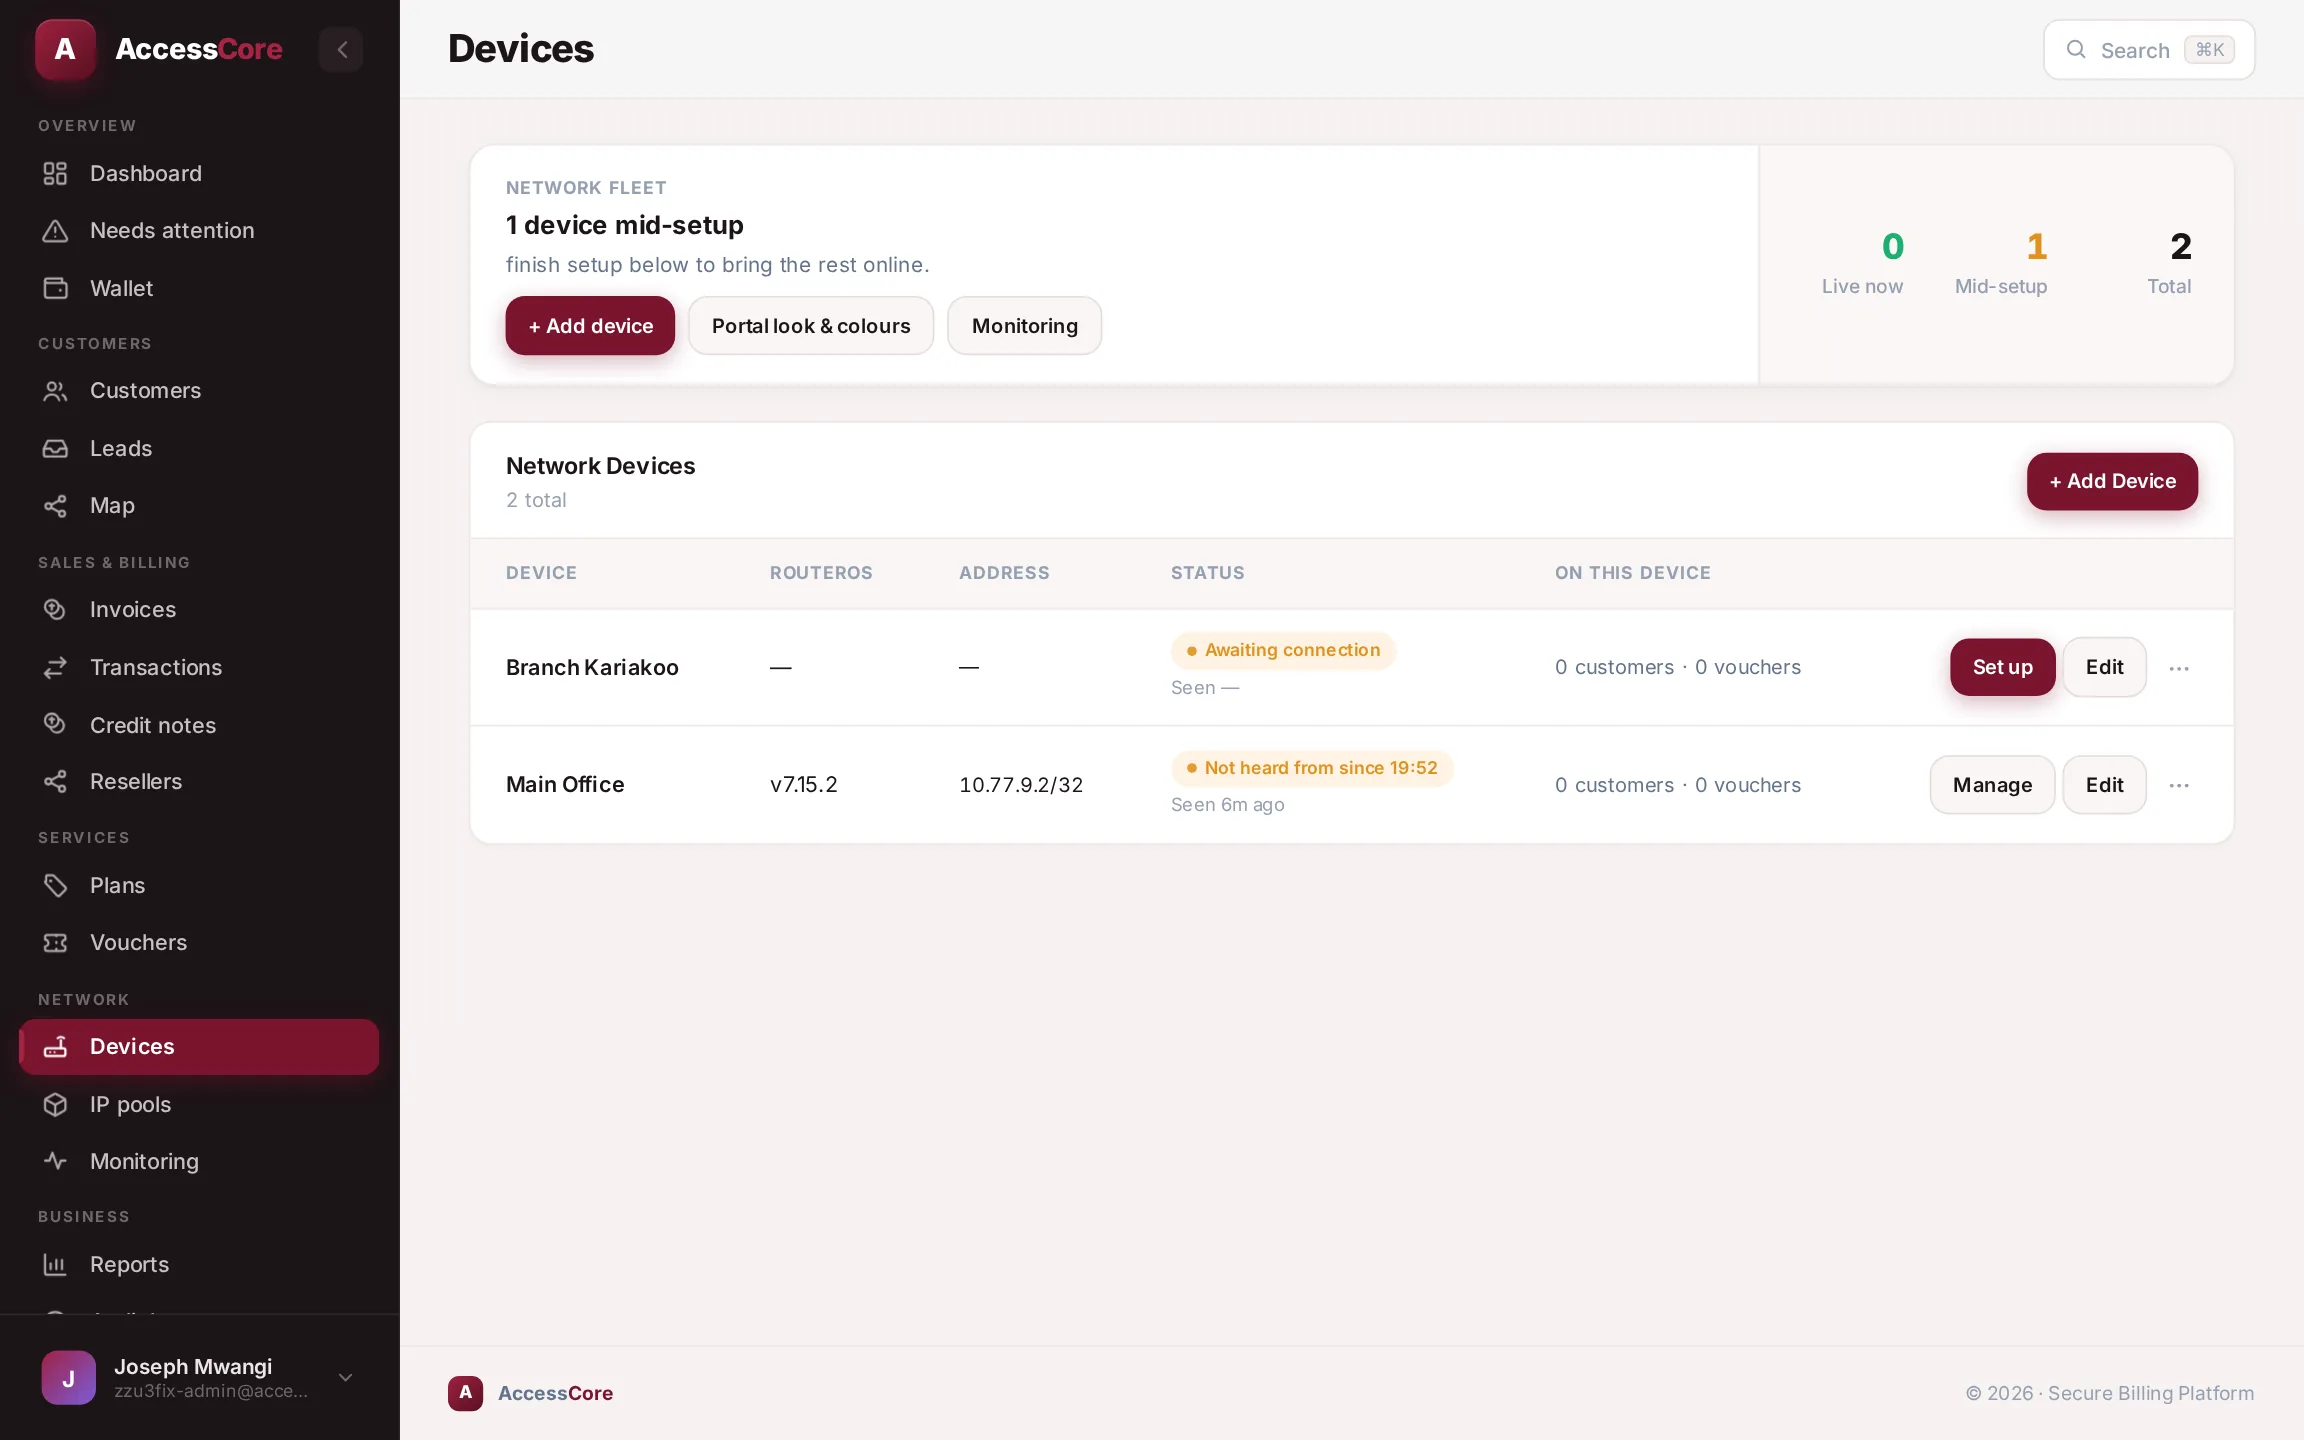
- The device shows a green Connected pill on your Devices list.
- The wizard finished with "the router confirmed every step".
- Connect a device has checked itself off on your dashboard setup guide.
Write to [email protected] — a person reads every message.